The Electrical Anatomy of a Level 2 Circuit
A Level 2 circuit has four working parts: a two-pole breaker in the panel, conductors sized for the load and the run length, the charging equipment itself, called EVSE in the code, and the connector and cable that meet the car. The vehicle converts AC power to DC for its battery through its onboard charger, so the wall unit is really a controlled, safety-monitored supply rather than a battery charger in the strict sense.
Power follows a simple relationship. At 240 volts, a unit set to 32 amps delivers about 7.7 kilowatts, a 40-amp unit about 9.6 kilowatts, and a 48-amp unit about 11.5 kilowatts. The car, the equipment setting, and the circuit capacity all act as ceilings, and the slowest of the three sets the actual speed. Installing a high-output unit behind a car with a smaller onboard charger adds no speed today, though it may help a future vehicle.
Understanding that chain prevents a common disappointment seen in installer videos and owner forums: a driver expects the nameplate speed, but the vehicle limit or a conservative circuit setting governs instead. A careful installer explains all three ceilings before recommending equipment.
Continuous Load and the 125 Percent Sizing Rule
Charging is classed as a continuous load because it can run at full draw for three hours or more. NEC Article 625 therefore sizes the branch circuit at 125 percent of the equipment rated current. The arithmetic is consistent: a 32-amp charger needs a 40-amp circuit, a 40-amp charger needs a 50-amp circuit, and a 48-amp charger needs a 60-amp circuit.
This is often called the 80 percent rule from the other direction, since the ongoing draw should not exceed 80 percent of the circuit capacity. It exists because sustained current heats conductors, terminals, and breaker contacts for hours. Margins that are generous for a kettle running three minutes matter greatly for a load running all evening.
The same thinking applies to adjustable equipment. Many units can be configured to a lower output during installation to match a smaller circuit. Under NEC 625.42, where restricted settings or a listed energy management system control the load, the calculation can use the managed maximum rather than the hardware nameplate, when the setup meets the code conditions and the setting is properly marked.

Conductors, Breakers, and Protection Choices
Conductor size follows the circuit capacity, the insulation temperature limit, and the length of the run. Longer runs may need larger conductors to limit voltage drop, which otherwise wastes energy as heat and can slow charging. Electricians also respect terminal temperature limits at the breaker and the equipment, which sometimes govern the choice more than the wire table alone.
Protection has layers. The breaker guards the conductors against overcurrent. Personnel protection against ground faults is built into listed charging equipment, and recent NEC editions require GFCI protection for receptacles used for charging, typically delivered by a GFCI breaker for a plug-in unit. Installers are careful about pairing equipment protection with breaker protection, since mismatched ground-fault devices are a known cause of nuisance tripping reported by owners.
Hardwired units avoid the receptacle questions entirely and are required for the highest output settings on many models. Where a receptacle is used, it should be a quality unit rated for sustained duty, torqued to specification, because a loose or worn receptacle is a documented source of heat damage on high-current circuits.
Load Calculation Before Anyone Promises a Circuit Size
Before a level 2 charger installation is quoted, the installer performs a service load calculation under NEC Article 220. For an existing dwelling adding a load, NEC 220.83 provides an optional method: general loads are totalled, the first 8 kVA counts in full, the remainder counts at 40 percent, and the larger of heating or cooling is added. The charger then joins the total at its continuous value.
A measured alternative exists in NEC 220.87, which uses recorded demand data from the utility or a metering period, applies a safety factor, and adds the new load. Whichever method is used, the point is the same: the verdict comes from arithmetic about your house, not from the panel label alone. Two homes with identical 200-amp panels can receive different answers because their appliance mixes differ.
If the total exceeds the service capacity, the options are a lower configured charging rate, a listed load management system, or a service or panel upgrade. Our panel upgrade page compares those paths. A trustworthy installer shows you the calculation rather than simply announcing that an upgrade is required.
Installation Day: Sequence of the Work
On the day, the electrician isolates the panel, adds the two-pole breaker, and runs the circuit by the agreed route, in conduit where protection is needed or inside wall and ceiling cavities where allowed. The equipment is mounted at the planned height, conductors are terminated and torqued, and the output setting is configured to match the circuit.
Labels matter more than homeowners expect. The panel directory should identify the new breaker as the vehicle charging circuit, and managed or restricted settings should be marked as the code requires, so the next electrician is not misled by a nameplate that no longer reflects the setup.
Most straightforward residential circuits are completed in a single visit of several hours. Work involving trenching, a subpanel, or a service change extends the schedule and may split across days while inspections and utility coordination happen between stages.
Commissioning: Testing Before the First Real Charge
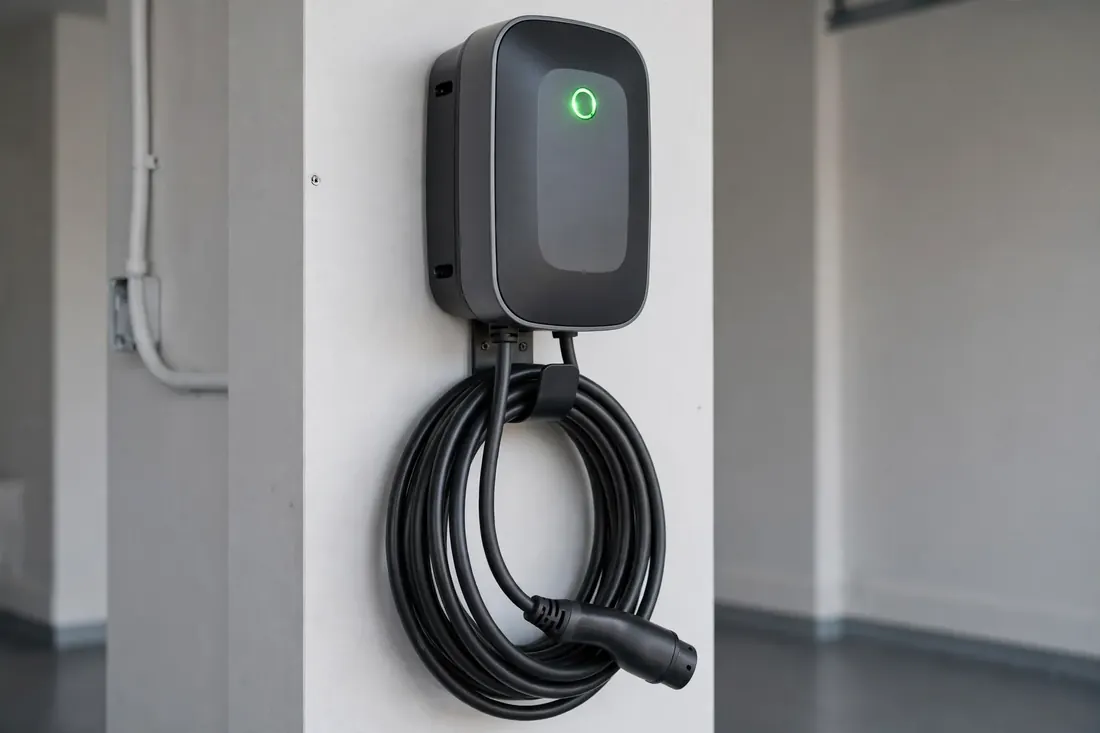
Commissioning separates a finished installation from a merely connected one. The installer verifies voltage at the equipment, confirms grounding and bonding, checks that ground-fault protection responds as designed, and confirms the configured current setting against the circuit capacity one final time.
Then comes a supervised first charge. The installer plugs into the vehicle, watches the session start, confirms the car reports the expected rate, and lets it run long enough to spot heat at connections or unexpected tripping. Any app pairing, scheduling, or sharing features are set up now, while help is standing beside you.
Keep the paperwork from this stage: the permit sign-off, the equipment manual, and the load calculation. Together they answer most future questions from insurers, buyers, and the next electrician who opens your panel.
One last commissioning habit worth copying from professional installers is recording the baseline. Note the voltage at the unit, the configured current, and the rate the car reports during that first session, and keep the note with the permit paperwork. Months later, if charging ever feels slower or a fault appears, that baseline turns a vague feeling into a comparison, and a service visit can start from evidence rather than memory.
Hardwired Versus Plug-In at Level 2, in Detail
The hardwired versus plug-in choice changes the technical picture. Hardwired Level 2 equipment connects directly, supports the full range of output settings, and removes receptacle wear from the system. It is the usual route for outdoor locations and for units set above 40 amps of output.
Plug-in equipment, most often through a NEMA 14-50 receptacle on a 50-amp circuit, trades a little maximum speed for removability. The receptacle itself becomes a maintenance item: it should be inspected for discoloration or looseness if charging ever feels intermittent, and replaced with a heavy-duty rated unit when worn.
Either way, the circuit remains dedicated. Under NEC 625.40, charging equipment above small thresholds requires its own branch circuit with no other outlets or loads, because a continuous multi-hour draw cannot safely share capacity with unrelated appliances.
Two Chargers, One Service: Sharing and Management
Homes with two vehicles often ask whether two Level 2 units need two full circuits. Frequently they do not. Listed sharing systems let a pair of units divide one circuit or a managed allowance, so each car charges more slowly when both are connected and faster when only one is. Overnight, that division still fills both cars for most households.
NEC 625.42 supports this by allowing the service calculation to use the managed maximum where a listed energy management system controls the equipment. The key conditions are that the system is listed for the purpose, the settings are secured against casual change, and the arrangement is documented at the panel.
Tell your installer about a likely second vehicle even if it is years away. Leaving conduit capacity, panel space, and a noted plan costs little during the first level 2 charger installation and avoids reopening finished walls later.
Regional Notes and Where to Read Next
Technical rules are national, but the adopted NEC edition is local. States and cities adopt editions on their own schedules, and details such as receptacle protection differ between editions. Utility voltage also varies: some homes receive 240 volts, while many multi-family and commercial supplies deliver 208 volts, which lowers Level 2 power somewhat at the same current.
City pages on this site add that local layer. A reader planning level 2 work alongside ev charger installation in Austin can check local permit practice, while someone comparing ev charger installation in Denver can check altitude and winter notes that affect equipment choice. The circuit mathematics in this page stays the same everywhere.
Ready to move from reading to measuring your own panel? Call Now and have your panel size, your vehicle, and your parking layout ready. Those details let an installer size your circuit correctly on the first visit.
Choosing Your Amperage: Matching Circuit Size to Daily Miles
The most practical way to choose a Level 2 circuit size is to work backwards from your driving. Estimate the miles you must replace on your heaviest regular day, then divide by the hours the car realistically sits plugged in. A driver replacing forty miles over ten parked hours needs only a gentle charging rate, while a driver replacing one hundred miles over six hours needs a substantially stronger circuit to wake up ready.
Translate that need into equipment settings with the relationship used earlier in this page: at 240 volts, each amp of charging current delivers roughly a quarter of a kilowatt. A 24-amp setting therefore provides about 5.8 kilowatts, a 32-amp setting about 7.7 kilowatts, and a 48-amp setting about 11.5 kilowatts. Multiply kilowatts by your parked hours and you have a fair picture of the energy, and roughly the range, a night delivers.
Three common patterns emerge. Light drivers with short commutes and long home time are well served by the smaller settings, which are also the kindest to a limited panel. Typical commuters land in the middle settings, replacing a full day of driving in a few hours and leaving the rest of the night as buffer. High-mileage drivers, ride-share drivers, and households sharing one charger between two cars benefit most from the higher settings, provided the vehicle onboard charger can accept the power and the service calculation supports it.
Choosing one step above your calculated need is reasonable headroom for winter, when cars use more energy per mile. Choosing several steps above it buys little, because the vehicle ceiling and the overnight hours, not the wall unit, become the limit. Let your mileage pattern, not the largest number on a box, set the circuit.
Voltage, Efficiency, and Losses Owners Rarely Hear About
Two quiet details shape real Level 2 performance. The first is supply voltage. Homes are often described as 240-volt, yet actual voltage wanders within an allowed band, and some properties receive 208 volts from a three-phase supply. Because power is voltage multiplied by current, the same charger setting delivers less power at the lower voltage, which lengthens sessions by a noticeable margin without anything being wrong.
The second detail is conversion loss. The vehicle onboard charger converts AC to DC and loses a modest share of energy as heat in the process, so the energy drawn from the wall is a little more than the energy stored in the battery. This is normal physics shared by every AC charging setup, and it is one reason Level 2, with its shorter sessions and more efficient operating range, generally wastes less energy overall than long Level 1 sessions on the same car.
Installers also watch conductor temperature and termination quality because resistance at a poor connection turns into local heat rather than useful charge. That is why torque specifications appear in equipment manuals, why commissioning includes a supervised run, and why a circuit that was fine for a dryer duty cycle deserves fresh attention when it begins carrying a continuous vehicle load for six hours a night.
Level 1 vs Level 2 Charging: Which Fits Your Life?
The clearest way to feel the Level 1 to Level 2 jump is in hours and miles. Here is the practical contrast a level 2 charger installation creates.
- Delivers about 1 to 2 kilowatts from a standard outlet
- Adds roughly 2 to 5 miles of range each hour
- A long driving day can take well over a day to replace
- No dedicated circuit, so no headroom for faster future cars
- Fine as a backup or for very light daily use
- Delivers roughly 3 to 19 kilowatts depending on circuit and settings
- Adds roughly 10 to 30 miles of range each hour
- A typical daily drive is replaced in a few evening hours
- Dedicated circuit sized at 125 percent of the charging load
- Scales with higher-capacity vehicles and shared two-car setups
Find Level 2 Charger Installation Near You
Local permit rules, utility programs and housing stock change how this work gets done. Pick your metro for a guide researched for your city:
- EV charger installation in Los Angeles, CA
- EV charger installation in Houston, TX
- EV charger installation in Phoenix, AZ
- EV charger installation in Atlanta, GA
- EV charger installation in Miami, FL
- EV charger installation in Dallas, TX
- EV charger installation in Austin, TX
- EV charger installation in Seattle, WA
- EV charger installation in Denver, CO
- EV charger installation in San Diego, CA
- EV charger installation in Chicago, IL
- EV charger installation in Las Vegas, NV
- EV charger installation in Charlotte, NC
- EV charger installation in Tampa, FL
- EV charger installation in Portland, OR